Are you ready to send a cozy winter greeting? How does a watercolor hand-painted greeting card sound?!
Today I'll show you a step-by-step watercolor tutorial with negative-space painting techniques! I know this sounds scary, but I promise, it's all bark and no bite! In this tutorial, the first and second steps will start slow with simple shapes, and in no time, you'll be making a fine illustration by combining those same simple shapes. I'm so excited to create this beautiful snowy scene with all of you!
There's a ton of different ways to paint this scene, so feel free to learn more about negative space painting techniques and then paint the scene in your own way!
Supplies

- Watercolor paper
- Watercolors
- Opaque white watercolor
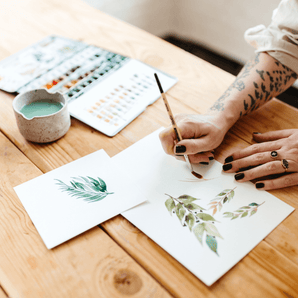
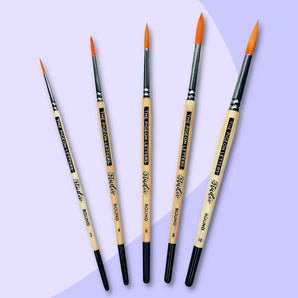
- Watercolor brushes
- Palettes
- Drawing gum
- Compass or circular can (anything that can create a circle!)
Step 1: Practice how to paint negative space

Your first practice round is a round shape. Draw a few snowmen from the bottom to the top of your page. Apply clean water around the center of your snowmen, but try to avoid the edges! Take a neutral tint and start painting negative space on the bottom snowmen - this time gently touching the edges.
The most important part of this step: LET DRY COMPLETELY! Don't hurry through this and onto the next step. It's better to allow the piece to naturally dry, but we live in a busy world, so if you must, feel free to use a hairdryer to dry the piece.
Once the bottom snowmen are dry, repeat the step on the middle and top snowmen, letting each row dry before starting the next.

Another way to practice is by drawing simple triangles to make pine trees.

Pro tip: Draw the first shape of the tree as a long triangle and then add branches.

The third way to practice is by drawing a moon and stars! When you draw some stars, let some of them overlap under the moon and other stars. It'll make the piece look great when you paint the negative space!
Step 2: Sketch a snowman or two

Prepare your watercolor paper! Any size of the paper will work, but I highly recommend getting a block so you don't have to hold the paper with tape. I love using 227x158 sized blocks but apparently, that size is only available in Japan. Who knew!
If you're using paper on a pad or sketchbook, I recommend separating the paper from the pad or book and using washi tape to keep your paper flat. We're using a lot of water with this painting and we want the paper to be able to get wet and dry repeatedly.
Draw a circle if you have a compass, or trace a circle if you're using something else. Just make sure to draw a good circle! For setting the composition, draw a line through the circle vertically and horizontally. You've now divided your circle into four sections!

You've already practiced on snowmen, pine trees, moons, and stars, so now we're going to put them all together for the greeting card. Can you see it now? It'll look just like a snow globe.
Start with the snowman on the bottom-left section of the circle. Try to fit him into your bottom-left section so you can fit another snowman in the bottom-right section next.
Draw a crescent moon on the top-left section using any circular object. Don't forget to sprinkle some stars in there too!
Add in your pine tree which should fit nicely into the right side of the circle. The pine tree may be shorter for perspective. If you'd like to fill more space - try adding more stars to your sky or trees to the earth.

Erase any unnecessary pencil lines to make your sketch look cleaner.
Step 3: Masking and wash

Before you begin your painting, we need to go over a critical step to making your greeting card look its absolute best! Using drawing gum for masking is an easy way for your painting to really pop. Drawing gum is also very easy to use!
Apply the drawing gum to your front snowman's hat and gloves. You should also apply it to your back snowman's nose, hat, and a little to the tops of your first pine tree. Do not apply the drawing gum to your second pine tree! Then, let dry.

Pick three colors and swatch them on your palette to see how they mix together. We're doing this to make sure that your colors won't make a muddy color. Try to get really creative here and use colors that are outside the norm for the season. I'm using a lot of bright colors to really break those color boundaries!

I love a pink moon because it's so out of the ordinary. When you're painting your moon and stars, be careful not to get paint on your snowmen. They'll look so much better if they're white for the total contrast! Oh, and by the way, your negative space painting has already started!
Let's paint the pine trees with lots of colors, almost like a rainbow. If you have time, try a couple of different color combos! Let your paint try completely again. Don't try to rush this part! Have a cup of tea, relax, and most importantly, wait.
Grab your drawing gum again and apply it to the back pine tree.
Step 4: Negative space painting

Above I've shown you the order of the painting when it comes to where and when we're applying our negative space. Take the neutral tint and start creating the negative space from near the edge to the outside.

Make sure to have another brush with clean water to familiarize the color so it doesn't create a harsh line when it dries.
Step 5: Add details

Remove the drawing gum by gently rubbing it off. Then, add details on the tree snow and your snowmen! You can use other materials to add details as well (white gel pen, white watercolor/gouache, or oil pastel!)

If you want to enhance the snow globe look, splash some opaque watercolor or liquid ink on the edges with a brush. I used the scrap paper and cut to match the size of the globe to add an extra layer to my snow globe. Use what you got!

The last step is totally up to you! You have the option to just cut the painting out in the circle shape and call it a day OR leave the bottom of the paper as a base for your snow globe. I did an extra little craft with it. Cut the paper as shown, following the pink line. Then, take the bottom strip and pull it back, and secure the two ends together. Then, your globe will stand on its own - like a real one!

If you add some lettering or a message on the base part, it'll be perfect! I hope you found this tutorial not only fun, but informative! Negative space is a great method to learn for all types of artists. I can't wait to see what you all create, don't forget to tag me (@kayokocreates)!

Hi, I'm Kayoko from Japan. I'm a self-taught watercolor artist who is working full time at a small Japanese restaurant in the mountains during the day. I've been painting mostly at night, since February 2019 when I started my watercolor journey.
I've been obsessed with negative-space painting since I first became familiar with the technique. I love to paint galaxies, nightscapes, and mosaic-style paintings.
I'm so grateful that you've been following along and took your time to complete this project! I really hope you've enjoyed this tutorial and you were able to create your own winter greeting card to send to your family, friends, and loved ones! I'm looking forward to seeing your results on Instagram! Feel free to tag (@kayokocreates) and please share it with your friends and family!
Wanna save for later? PIN IT!