What is your go-to thing to paint when you are in a rut? For me it is definitely trees!! Today we will paint some quick and easy watercolor trees for summer, fall and winter. I think the trick with these is to keep things loose and I’ll show you just how to do that as we go along!
Hi all! It’s Cris here from the Design Team and I love to paint along with the seasons! Trees are a great way to do this and they are perfect for things like cards, gift tags and placecards for the holidays. And honestly, they are just cute and fun to paint!
Supplies:
- Watercolor paper (140 lbs cold pressed - you only need a scrap!)
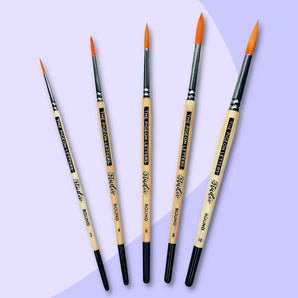
- The Pigeon Letters round watercolor paintbrushes (sizes 6 and 2)
- Watercolor paints (any paints you like! I used Winsor & Newton scarlet lake, winsor yellow deep, sap green, cadmium orange, cobalt blue, burnt umber and sepia and Daniel Smith deep sea green)
- Clean water and paper towel for blotting
Want to watch the tutorial instead?
Step 1: Paint Summer Tree Top

Our first step is to paint the top of our “summer” tree. Start by using lots of water and just a little green pigment on your brush. Make some roundish, swirly shapes by dabbing your brush lightly. Leave a good bit of white space and keep it loose (see number 1 above). Once you have a general shape (it doesn’t have to be symmetrical), add your darker greens at the bottom of your little shapes and toward the center of the tree (see number 2 above). This gives the feel of shadows and depth. Feel free to use some different greens for variation! You can use a clean brush with a little water to sort of blend some of your shapes together for a more cohesive look if you like (see number 3 above).
Important Tip: By holding your brush toward the end (away from the bristles), you will have less control and it will help keep your shapes loose and free!
Step 2: Paint Summer Tree Trunk

Next, we’ll add the trunk using our size 2 brush. Start with outlining the trunk by painting the two sides (see number 1 above). It’s totally okay if this bleeds into your tree top! Next, fill the center of the trunk with water and blend the sides in a little. You can add some additional branches up into the leaves if you like (see number 2 above).
Finally, fill in the trunk with a little more paint. For extra dimension go over the edges with a dark brown, like sepia (see number 3 above). And voila! You have a happy summer tree!
Step 3: Paint Fall Tree Top

We’ll follow the basic steps above to create our fall tree top. I still started with a little green on my brush (see number 1 above) and slowly added my fall colors. It’s okay if it doesn’t look like a tree as you go! It will look very “blobby” at first. After you have the basic shape (I made this one more of an oval), add in your orange and just a touch of red.
I kept some dark green in the center and toward the bottom of mine just to keep some depth and dimension. A few red highlights can really add a fun punch of color!
Important Tip: You can keep adding pigment to your tree top as long as it is still wet (this is the wet-on-wet technique). If you wait until it’s dry, the colors won’t bleed together.
Step 4: Paint Fall Tree Trunk

Again here we will follow our steps above to paint our tree trunk. I thought it would be fun to add some branches up in the tree top (see number 2 above) and some little leaf dots at the edges. You can even bring some little branches outside the tree top if you like. I think these details give our fall tree a whimsical feel!
Step 5: Paint Pine Tree

Last, but not least, it’s time for our little evergreen! Start with your size 6 brush, lots of water and just a little green pigment. Holding your brush at the end, make little sweeping motions with the tip starting in the center (see number 1 above). Don’t forget to paint some branches in the center and to leave some white space between branches as well (see number 2 above). Here again, once you have your basic shape, add in those darker tones at the bottom and toward the center of the tree (see number 3 above). Leaving that white space can give the impression of snow! You can add a little trunk if you like (sometimes they are hard to see on winter pines) and even have it showing higher in the tree in a few spots (see number 4 above).
Now your happy pine is complete!
Important Tip: Try adding some blues to your greens when you paint pines! If you’ve ever seen a blue spruce, you’ll know they actually are quite bluish!
I sure hope you enjoyed this tutorial and I would love to see your happy watercolor trees! Share them on instagram and tag @thepigeonletters and @sweetseasonsart!
Happy painting!

See all of Cris’ tutorials on the blog!
Cris is a self-taught artist living in Richmond, Virginia. She works in watercolor (her first love), gouache and digital design. She gravitates to botanicals, but loves painting along with the seasons and trying new subject matter like food, buildings and birds!


