During the last 3 tutorials I showed you how to make inks or gouaches. Today, we will use those previous colors to paint an abstract. But today, I will also show you how to make homemade turmeric ink. One thing I really wanted to share with you is how I paint an abstract with those inks. I can't wait to show you all this, let's dive into the magic world of painting with natural colors.
Hello, I am Adeline-Julie. I am passionate about watercolor painting, pigments and natural colors. One of my favorite things is to share with you what I have experienced in my studio to show you the process of making homemade natural colors. With this easy ink recipe you will succumb to the magic of homemade ink and natural colors.
Supplies:
To make the turmeric ink:
- Turmeric Rhizomes
- Water
- A coffee filter holder
- A coffee filter
- Spoon to measure
- 4 different jars with lids
- Knife
- Gloves
- A cutting board
- Gum arabic (optional)
- Clove EO
- Paper, scissors & a pencil to label

To paint an abstract with turmeric Ink and our previous colors:
- Round brush N°2
- Round brush N°8
- Round brush N°16
- The filbert brush
- The wash brush
- The #0 script liner brush
- Cold press watercolor paper (A4)
- A twig (wheat twig style)
- A cotton yarn not to thin
- A chopstick
- Lemon juice with an eyedropper
- Paper towel or old fabric
- Homemade onion skin ink and walnut ink
- Homemade onion skin ink gouache
- Homemade turmeric ink

Watch the video tutorial!
Step 1: Make Your Ink
- Cut the turmeric into small pieces.
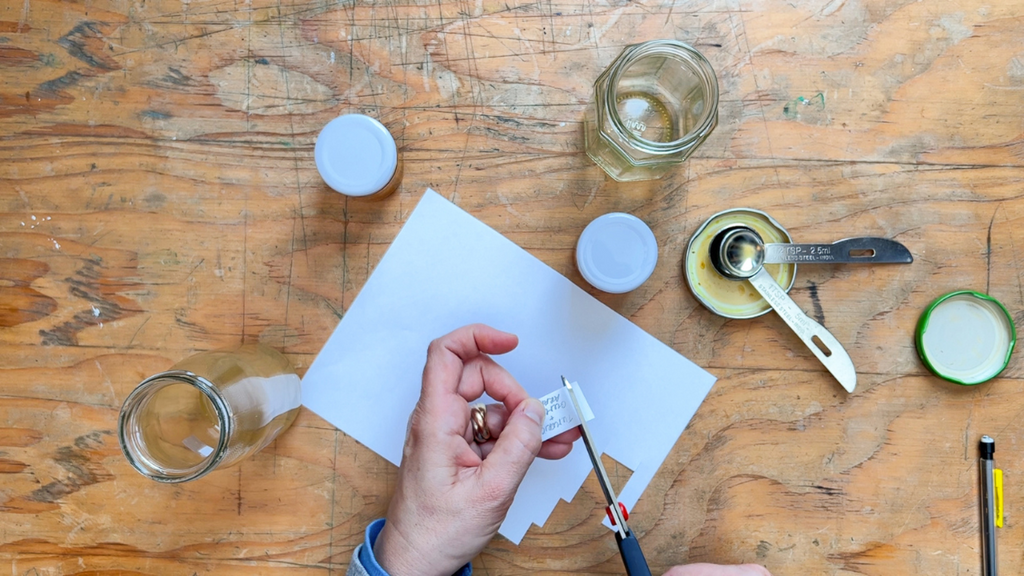
Start by putting on your gloves and use all the parts of the turmeric root and cut that up into small pieces to get a better color transfer when we put the cut up pieces in the water.

- Put the cutted turmeric in an empty jar and add water.
Put the pieces in the empty jar and cover with water. To make sure you don't put in too much water, take a spoon and cover it with water. Leave macerate at least for 24 hours.

- Pass your juice into a coffee filter and add 2 drops of clove EO
Once it has macerated long enough and you find the color intense enough, strain it through a coffee filter. If you want you can add clove EO. By adding 2 drops of clove Essential oil, you will prevent mold.

- Add gum arabic and label your jars.
With a spoon transfer the ink into the small jar. Keep one jar with the pure ink and add the gum arabic preparation in the other jar. If you put 5 times 1/2 teaspoons of ink, put 1 teaspoon of gum arabic preparation. Once you have mixed your ink with gum arabic, label correctly what you have in your containers.

Step 2: Paint a Background
Take the wash brush and dip it into the turmeric ink. Then start at the top of your paper and draw a rather rectangular shape. Change the direction of the brush strokes. The goal is not to make a perfect flat without brushstrokes or marks. We want to have something completely random or intuitive.
I will show you a little trick. If you are left handed, put it in your right hand and if you are right handed, in your left hand. It is in a way liberating because we continue to paint and our attention is focused on this hand that we do not use often and therefore we will be much more precise in our gestures.
Keep the wash brush and dip your brush in the onion skin ink. And reproduce another style of rectangle, switch hands to let go and paint this rectangle at the bottom of the sheet. It is better if the two rectangles do not touch each other completely because the white space will balance the other two rectangles. Leaving a bit of paper visible balances the different areas.


Explore some of the best cruelty-free art supplies over here!
Step 3: Paint Dots with Walnut and Onion Drops
Take the round brush N°16 and dip it into the walnut ink. Use the wet on wet technique to draw the spots and make great diffusion of the inks on the paper. Then change ink color and take onion ink and apply it into the turmeric ink rectangle in a bigger and more voluminous way. You can help the ink to diffuse in your gesture and help it to go to the place where there is the mixture of the different inks.

Step 4: Trace Different Random Lines and Strokes
Take the yarn, go from the left of the painting to the right of the painting. Start from places where there is no ink, on the edge of the sheet per example and give your yarn a path through the painting.
Take the #0 script liner brush and go through the areas with ink to take it into the bristles of the brush and stretch it through the composition and the different paint spots.
Take the chopstick and where there is the cluster of inks, go back and forth as if you wanted to make the watery mass decrease. Do this in the 2 ink zones.
Finally, take the lemon juice with an eyedropper. If you don't have an eyedropper take the round brush N°16 and make scatter patches in the places where there is walnut ink. You can use the eyedropper as a guide like a pencil while spreading a bit of lemon juice. Let it dry.

Step 5: Add Round Shapes and Dots with Different Colors
Take the filbert brush for a different brush stroke shape and dip it into the walnut ink. Start at the top left of your painting to mark with the walnut ink. You can see how the tilt of the brush allows for a different style of form, which is why I love this brush.
Take the round brush N°8 and dip it into turmeric and make little round shapes. You can put the turmeric dots next to other values and off-set from certain areas that are still blank.

Step 6: Trace Lines and Connect the Dots
Take the twig and dip the twig in the darkest ink, the walnut ink. The goal here is to connect some of the different circles that were just drawn.
Take the round brush N°2 and dip it in the onion ink. Here the goal is to add another color sparingly. Take your brush at the end of the handle and pretend you don't know how to hold it. Try to make your hand movement a little jerky.

Step 7: Add Splatters
The fun part! It's time to make some splashes. Take the round brush N°16 and dip your brush in the walnut ink. Tap on the handle of your brush and let the splatter spread and settle on the paper. Choose a place to do it, don't do it all over the composition.
Then take the the #0 script liner brush and draw connections between the smaller splashes and the larger ones. Connect the spots. Make one to three passes and make tangled curls as you go back and forth with your brush.

Step 8: Add Random Shapes with Ink and Gouache
Then take round brush N°16 and add color to certain areas of the composition. Dip in the onion ink, then in the turmeric ink. Feel free to put colors where you want them. The idea is to go close to areas that have already been worked on to add a layer or a texture and to go as close to areas that are not very rich in material, traces, line, color and apply a color.
Take the filbert brush and take the onion gouache. Use the filbert brush shape to mark your paint differently. Don't add too much.

Step 9: Add Lemon Juice
Final step is to add lemon juice. With the eyedropper apply drops of lemon juice in the elements that you have just painted with gouache. If you don't have an eyedropper take the round brush N°16 to leave drops of lemon juice and make strokes and let it dry.

Once you’ve tried this tutorial, tag me (@adelinejuliebee) and Peggy (@thepigeonletters) so we can share your paintings. I was so happy to take you into the magic world of painting with natural colors. I hope you enjoyed it, let me know! Cheerio friends 😉

See all of Adeline-Julie’s tutorials on the blog!
Adeline-Julie is an artist and teacher specializing in watercolor. Former textile designer, lover of pigments and natural colors, she finds her inspiration while foraging through the bountiful valleys of the Belgian Ardennes collecting ingredients used to create her own inks & watercolors.


