How often do you find yourself at home, months after a trip, trying to recall the name of the little village with the best gelato ever? Or trying to explain to a friend the winding route you cycled across an island? Let’s solve that problem together by creating a travel map that incorporates memories from your own trip!
Supplies
- iPad or tablet
- Procreate app
- TPL Procreate brushes (I suggest the gouache brushes, vintage texture kit, drawing + writing brushes
- TPL lettering grids for Procreate
- Travel Adventure Line Drawing book
- Map of your travel location
- Travel map checklist
Step 1: Gather your travel details
Before diving in to illustrating, it’s best to spend time gathering all of the information you wish to include on your map. Some things - like cities, towns, and street names - are obvious, but others will take some thought.
I’ve included a travel map checklist with prompts to help you get started. What makes this project fun is that you aren’t creating a generic city or country map, you’re creating a map of your personal travel experience! It may help to scroll back through photos and videos to recall specific experiences that you may have forgotten about. Jot everything down; you don’t have to include it all on your map, but it will make the project much easier when you’re not stopping mid-illustration to look up random details.

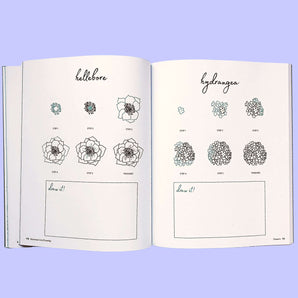
It’s also time to pull out Peggy’s Travel Adventure Line Drawing book! This book is a great guide to drawing loads of travel related doodles and is a perfect way to add illustrations to your map. Go through the book and jot down the page numbers of any drawings that match up with the locations on your list.

Step 2: Sketch your map
In Procreate open up a blank document in your preferred size. If you plan to print your map, make sure it’s got a resolution of at least 300dpi.
Use a pencil brush and begin sketching your map. You have the option of taking a screenshot from Google maps and loosely tracing it on a new layer or free-handing your sketch. Either way, I suggest keeping the sketch loose and wobbly as this sets a whimsical tone for the rest of your map.
Before filling the map in, add the location name in a spot that is prominent but not directly in the way of where you’ll illustrate the rest of the map. I suggest using The Pigeon Letters lettering grids (stamped on a separate layer) to assist with the layout and consistency of your letters.

Step 3: Add the main locations to your map sketch
It’s time to dig into your list of locations, sights, and experiences and start adding them to your sketch! Start with your anchor points - that is anything that sets the location. Cities and towns if you’re focusing on a country or region; street names and neighborhoods if you’re focused on a city or town. Next, add any natural features and their names to your map. Oceans, seas, lakes, mountains, fjords, volcanoes, and so on. These are often a big part of their region and should be on your map.
You can add some travel doodles to the locations in this step, but choose only a few important ones so you have room to add illustrations of landmarks and other sights later.

Check out the video tutorial below!
Step 4: Add landmarks
Now that your big locations are added, it’s time to fill in the rest of the map with the sights! Reference your master list and start with the most important or memorable items: this might be your hotel, historical sites and major landmarks you enjoyed, or a park you frequented during your stay. Remember that not everything from your list has to make it onto the map, but you can always add items now and remove them in the next steps. Add illustrations using the Travel Adventures Line Drawing book or create your own!


Step 5: Add your travel memories
This is where your map really becomes your own! Go through your list of travel memories and experiences and begin adding them to the map. If some areas become too cluttered, feel free to shift some elements around; this map isn’t meant to be perfectly to scale or geographically accurate, so you can take creative liberties with the layout. Add more doodles to these areas as well!

Step 6: Create paths and routes
Now it’s time to add in any paths or routes you took on your trip. It’s a fun way to show all of the ground you covered in whichever form of transportation you utilized most - even if it’s your feet! Once again I’ve listed common types of routes in the travel map checklist. My favorite way to depict routes or paths is to use a dashed or dotted line or by using a color that stands out against the background. Keep it flowy and curvy so your map doesn’t feel so structured. If you’re depicting an approximate route (say a flight path, a boat ride, or a train trip) you can add fun loops and swirls in there for a touch of whimsy. Don’t forget to add in a doodle of your transportation method!

Step 7: Ink your map
You’ve got a messy map sketch - now what? It’s time to polish up this sketch and add color to pull the map together!
Take your sketch layer and change the opacity to around 30% and the blend mode to multiply. Add a new layer below this one - all of your layers from now on will be below the sketch. Use the color and inking brush of your choice and outline the map border then fill it in.

Create a new layer - this will be for your location names - and choose a color and brush for lettering. Add all of the text labels onto your map, making sure you keep the lettering size and style consistent. There’s a lot happening on this map already, so too many variations in lettering will make it feel busy. If you have trouble with this, use some of The Pigeon Letters lettering grids (on a new layer) to assist.

On a new layer select a color and inking brush for your doodles. Go around the map and add all of the doodles from your sketch, referring back to the line drawing book as needed. Create one more layer and add any additional doodles, marks, or locations that you wish: waves and dolphins in the ocean, local plants or animals in empty spots around the map, etc.
Finally, you can add in any other bits you want, like weather icons or stats about your trip. I love putting a tally of my miles hiked/cycled/etc. somewhere on my maps!

You may be back home instead of out adventuring, but now you’ve got a great way to remember your trip! Share it on social media and be sure to tag me @thealiciabruce and @thepigeonletters so we can see your creations!
Where to find me online

See all of Alicia’s tutorials on the blog!
Alicia is a whimsical artist with a love of color and a refusal to act her age. She favors a mix of pastel and bright colors, reminiscent of southern California and the 1960s, and is inspired by her travels around the world. If she’s not at her desk, you can find her riding her skateboard around her neighborhood like a 6 year old.


