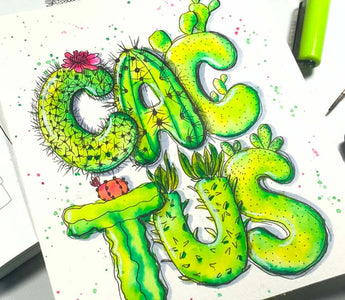
Want to paint some cute cactus inspired letters? Then, this tutorial is just for you! Today, we’re going to pick some cactus line drawings from Peggy’s book and turn them into letters!
Shannon here from the Pigeon Letters Design Team and I can’t wait to share a fun new way to spice up your hand lettering. Let’s get started!
Supplies
- Watercolor paper/mixed media paper
- Botanical Line Drawing Cactus & Succulents book
- TPL Monoline pens
- TPL #2 round paintbrush and water
- Water based markers or watercolor paint
- White gel/paint pen for highlights
Watch the step-by-step tutorial!
Step 1: Sketch Out Your Letters
Use a pencil to lightly sketch out the word you want to letter onto your paper in a large bubble style. You can try other letter styles if you want but bubble letters give you more room to add details.

Step 2: Draw Cactus Letters
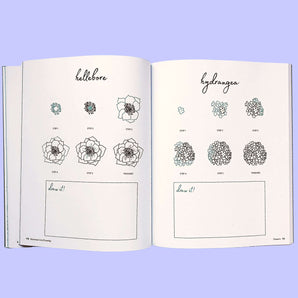
If you have Peggy’s Cactus Line Drawing Book, flip through until you find some cacti that you want to incorporate into your lettering, there are 200 illustrations for you to choose from. Here’s a look at the ones I went with and how you can draw them:
Snow White Cactus
Draw a flower at the top of your letter and add an outline all around the letter. You can make the outline uneven with a few gaps. Then add some dots all across the letter.

Add some spiky lines starting at the dot and pointing in different directions to complete the letter.

Toothpick Cactus
Draw the outline of the letter and then draw a few curved lines in the middle of the letter. Add a few dots in the middle of each section and then draw some long spiky lines coming out from the dots.

Indian Fig Cactus
Outline your letter and draw a few smaller cacti at the top and the bottom of the letter. Then add some dots to the letter.

Moon Cactus
Outline your letter with some jagged lines, then draw the plant at the top.

Horombe Clubfoot
Outline the bottom of the letter and draw some leaves at the top of the letter. Then add some pointy spikes all over the letterer.

Bunny Ears Cactus
Outline your letter, draw a few cacti at the top of the letter and then add some dots.

Step 3: Paint Your Letters
Choose 3 shades of green to paint your letters. Determine where your light source will be, mine is on the upper left corner so my shadows and dark colors will be on the bottom right side of my letters. Starting with the lightest shade first, add your green to the first letter.

Then add your mid tone green to the bottom and right side of the letter. Then use your paintbrush to blend the colors together.

Then add a small amount of the darkest shade of green to the shadow areas. Then use your paint brush to blend the color into the letter. If you’re using the Karin Markers, you can do this step while the paper is still wet. With other brands of markers, you can allow the lighter greens dry before adding the darker shade.

Repeat this step to paint the rest of the letters.
Step 4: Add Shadows and Highlights
Add a shadow to your letters using a light gray marker. Then use a white pen to add highlights in the upper left side of each letter.

Step 5: Add Splatters
Use your paint brush to add splatters that are the same color as your letters and that’s it!

I hope you enjoyed this week’s tutorial and learning how to create cactus inspired lettering! If you followed these steps and created your own cacti letters, remember to share it with Peggy (@thepigeonletters) and me on Instagram @byshannonlayne so that I can see how they turned out!

See all of Shannon’s tutorials on the blog!
Shannon is an artist from a small island in the Caribbean called Barbados! She creates fun and unique content, whether it's with markers, watercolors, acrylics or on the iPad to inspire other creatives.
Liked this blog? Pin for later!


