Today, we are going to paint a lovely creamy peach tone framed card with homemade gouache. Last time I showed you how to make onion skin ink. Today you are going to use this ink and make gouache with it. How fun is that! With your homemade gouache you will paint a delicate, creamy peach tone framed card. You will see how to paint different leaves, varying sizes and orientation around the frame to create a really nice composition thanks to the different sizes and shapes of the paint brushes. The only thing you have to do is follow the steps and dive into the magical world of painting with natural colors.
Hello, I am Adeline-Julie. I am passionate about watercolor painting, pigments and natural colors. One of my favorite things is to share with you what I have experienced in my studio to show you the magic of homemade natural colors in order to paint floral, plants, leaves and nature scenes with it. I can't wait to show you this. Let's dive into the inspiring and rewarding world of painting with natural colors!
Supplies:
To make the gouache:
- Onion skin ink
- Gum arabic
- Talc
- Chalk or “blanc de Meudon”
- Spoon to measure
- A glass tray (or marble, or a plate)
- A glass muller
- A painter’s knife
- A separate little jar
- A lid or empty shells
- Paper to clean up
- A jar of water

To make the creamy peach tone framed card:
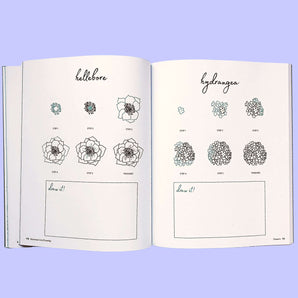
- Peggy Dean’s Guide to Nature Drawing & Watercolor
- Wash brush
- Filbert brush
- Liner 20/0
- Round brush N° 3/0
- Round brush N°2
- Round brush N°10
- Cold press watercolor paper
- Acid free sticker paper
- Paper towel
- Draft paper
- A pencil with rubber
- A ruler
- Scissors

Prefer following along with a video instead?
Step 1: Make Your Gouache
- Put 1 spoon of talc and chalk on the glass tray & add 2 spoons of ink.
Start by putting a teaspoon (5 ml) of talc in the middle of the tray and with the back of the spoon, dig a small hole to be able to put the ink in it. Add one same spoon of chalk. Then add 2 spoons of onion skin ink on the talc and chalk.

- Mix with the painter’s knife.
With the painter's knife, mix the different elements so that they blend together.

- Add gum arabic.
Add a smaller spoon (1,25 ml) of Gum arabic or the binder. Don’t put too much of it, just a tiny spoon. Otherwise the gouache will be too liquid. Mix all the ingredients with the painter's knife.

- Start mulling with your glass muller
Work the binder particles well into the pigments with figure-eight circles. The purpose of this action is to mix as well as possible and to make the particles of the different elements coated with each other.

- Collect your gouache
Collect your gouache in a lid or shells with the painter’s knife. It can dry in 24 hours.

Step 2: Draw a Rectangle & Cover with Sticker Paper
Draw a rectangle to make the frame. Measure 3 cm or 1,18 inches on each side of the paper from the border. To be sure to draw the straight line with the ruler, make 2 marks on each side and then draw the lines with the ruler. Now cover it with sticker paper.

Step 3: Paint Round Leaves
To have a slightly deeper or more intense hue, take your ink and take the spoon to put ink in the little jar. Instead of dipping in water, we're going to dip our brush in pure ink. Apply the filbert brush quite intuitively to make a round shape. Like if we paint eucalyptus or pilea leaves. The filbert brush has a natural round shape, which makes painting oval, round shapes very easy. Repeat the same pattern on the 4 corners.


Looking for THE best paintbrushes? We gotchu.
Step 4: Paint Bamboo Leaves
Apply the round brush N°10 with the color and paint very simple, slightly elongated form leaves that look like bamboo leaves. Paint them on the 4 sides of your rectangle. Don’t forget to vary the directions and vary the position on the rectangle.

Step 5: Paint Thinner Leaves
Take the round brush N°2 and apply the brush on an area on the sheet where there is room and to fill the frame. Place some leaves on the edge of the sticky paper and others not. Here, what really helps us to give variations of scales are the sizes and the shapes of the brushes.

Step 6: Add Stems to the Leaves
Take the liner script paint brush 20/0 and where you can add stems, draw them. This means also to draw stems on the first round leaves. You can vary the thickness of the stems if you want and take the round brush N°3/0 and continue to add stems here and there. Keep up with the round brush N° 3/0 and paint super tiny leaves. What I suggest is to give 3 brush strokes near one to another. Repeat that in the gaps but on the paper not on the sticker paper.

Step 7: Add Stems to the Super Tiny Leaves
Take the liner script paint brush 20/0 and add stems. Choose one of the 3 super small leaves and draw a first stem, then connect the other 2 remaining leaves on this first stem. Draw links between the leaves. Keep the liner script paint brush 20/0 and draw thin twigs from the rectangle to the edge of your paper.

Step 8: Touch Up the Composition
Take the round brush N°2 and add leaves to the border and where you have room and feel it’s a good option. To add stems take the round brush N° 3/0 and repeat previous already seen steps. If needed add leaves and stems with the previous different brushes and vary the thickness of the leaves and fill your composition. Then, take the wash brush and trace twigs. For that use the wash brush on its edge.

That’s it, let it dry.
Step 9: Remove the Sticker Paper
Make sure the gouache is dry. Always be careful not to tear the paper and gently remove the sticker paper. Look how beautiful it is. If needed, erase the pencil marks if any.

Once you’ve tried this tutorial, tag me (@adelinejuliebee) and Peggy (@thepigeonletters) so we can share your paintings. I was so happy to take you into the magic world of painting and natural colors. I hope you enjoyed it, let me know! Cheerio friends 😉
See all of Adeline-Julie’s tutorials on the blog!
Adeline-Julie is an artist and teacher specializing in watercolor. Former textile designer, lover of pigments and natural colors, she finds her inspiration while foraging through the bountiful valleys of the Belgian Ardennes collecting ingredients used to create her own inks & watercolors.


