
Potted plants are wonderful subjects for a graphic illustrative painting with gouache. They’re simple enough and bite-sized for a beginner and always cheerful to look at. In this tutorial, you’ll learn to create a colorful illustration of a hanging string of pearls plant, right from sketching to multiple layers of painting using acrylic gouache.
I’m Vinitha Mammen from The Pigeon Letters Design Team. I’m a freelance lettering artist and illustrator, and a Skillshare top teacher. I can’t wait to show you how I create minimal graphic houseplant illustrations using gouache.
Supplies:
- Acrylic gouache paints (alternatively, any gouache paint)
- TPL studio round brushes
- Watercolour or acrylic paper (at least 300gsm)
- Pencil
- Eraser
- Mixing palette
- Jar of water
- Paper napkins
- Ruler/masking tape
- Reference image

Prefer watching the video?
Step 1: Sketch the Potted Plant

Start by creating borders on all four sides of your sheet of paper either using a ruler or by taping the edges with masking tape.
Take some time to observe the reference image and then transfer the shapes onto the paper in the form of a simplified pencil sketch. You don’t need to incorporate every detail you see in the reference image. Feel free to ignore details you don’t care for, or even add your own fun elements.
Step 2: Choose Your Color Palette
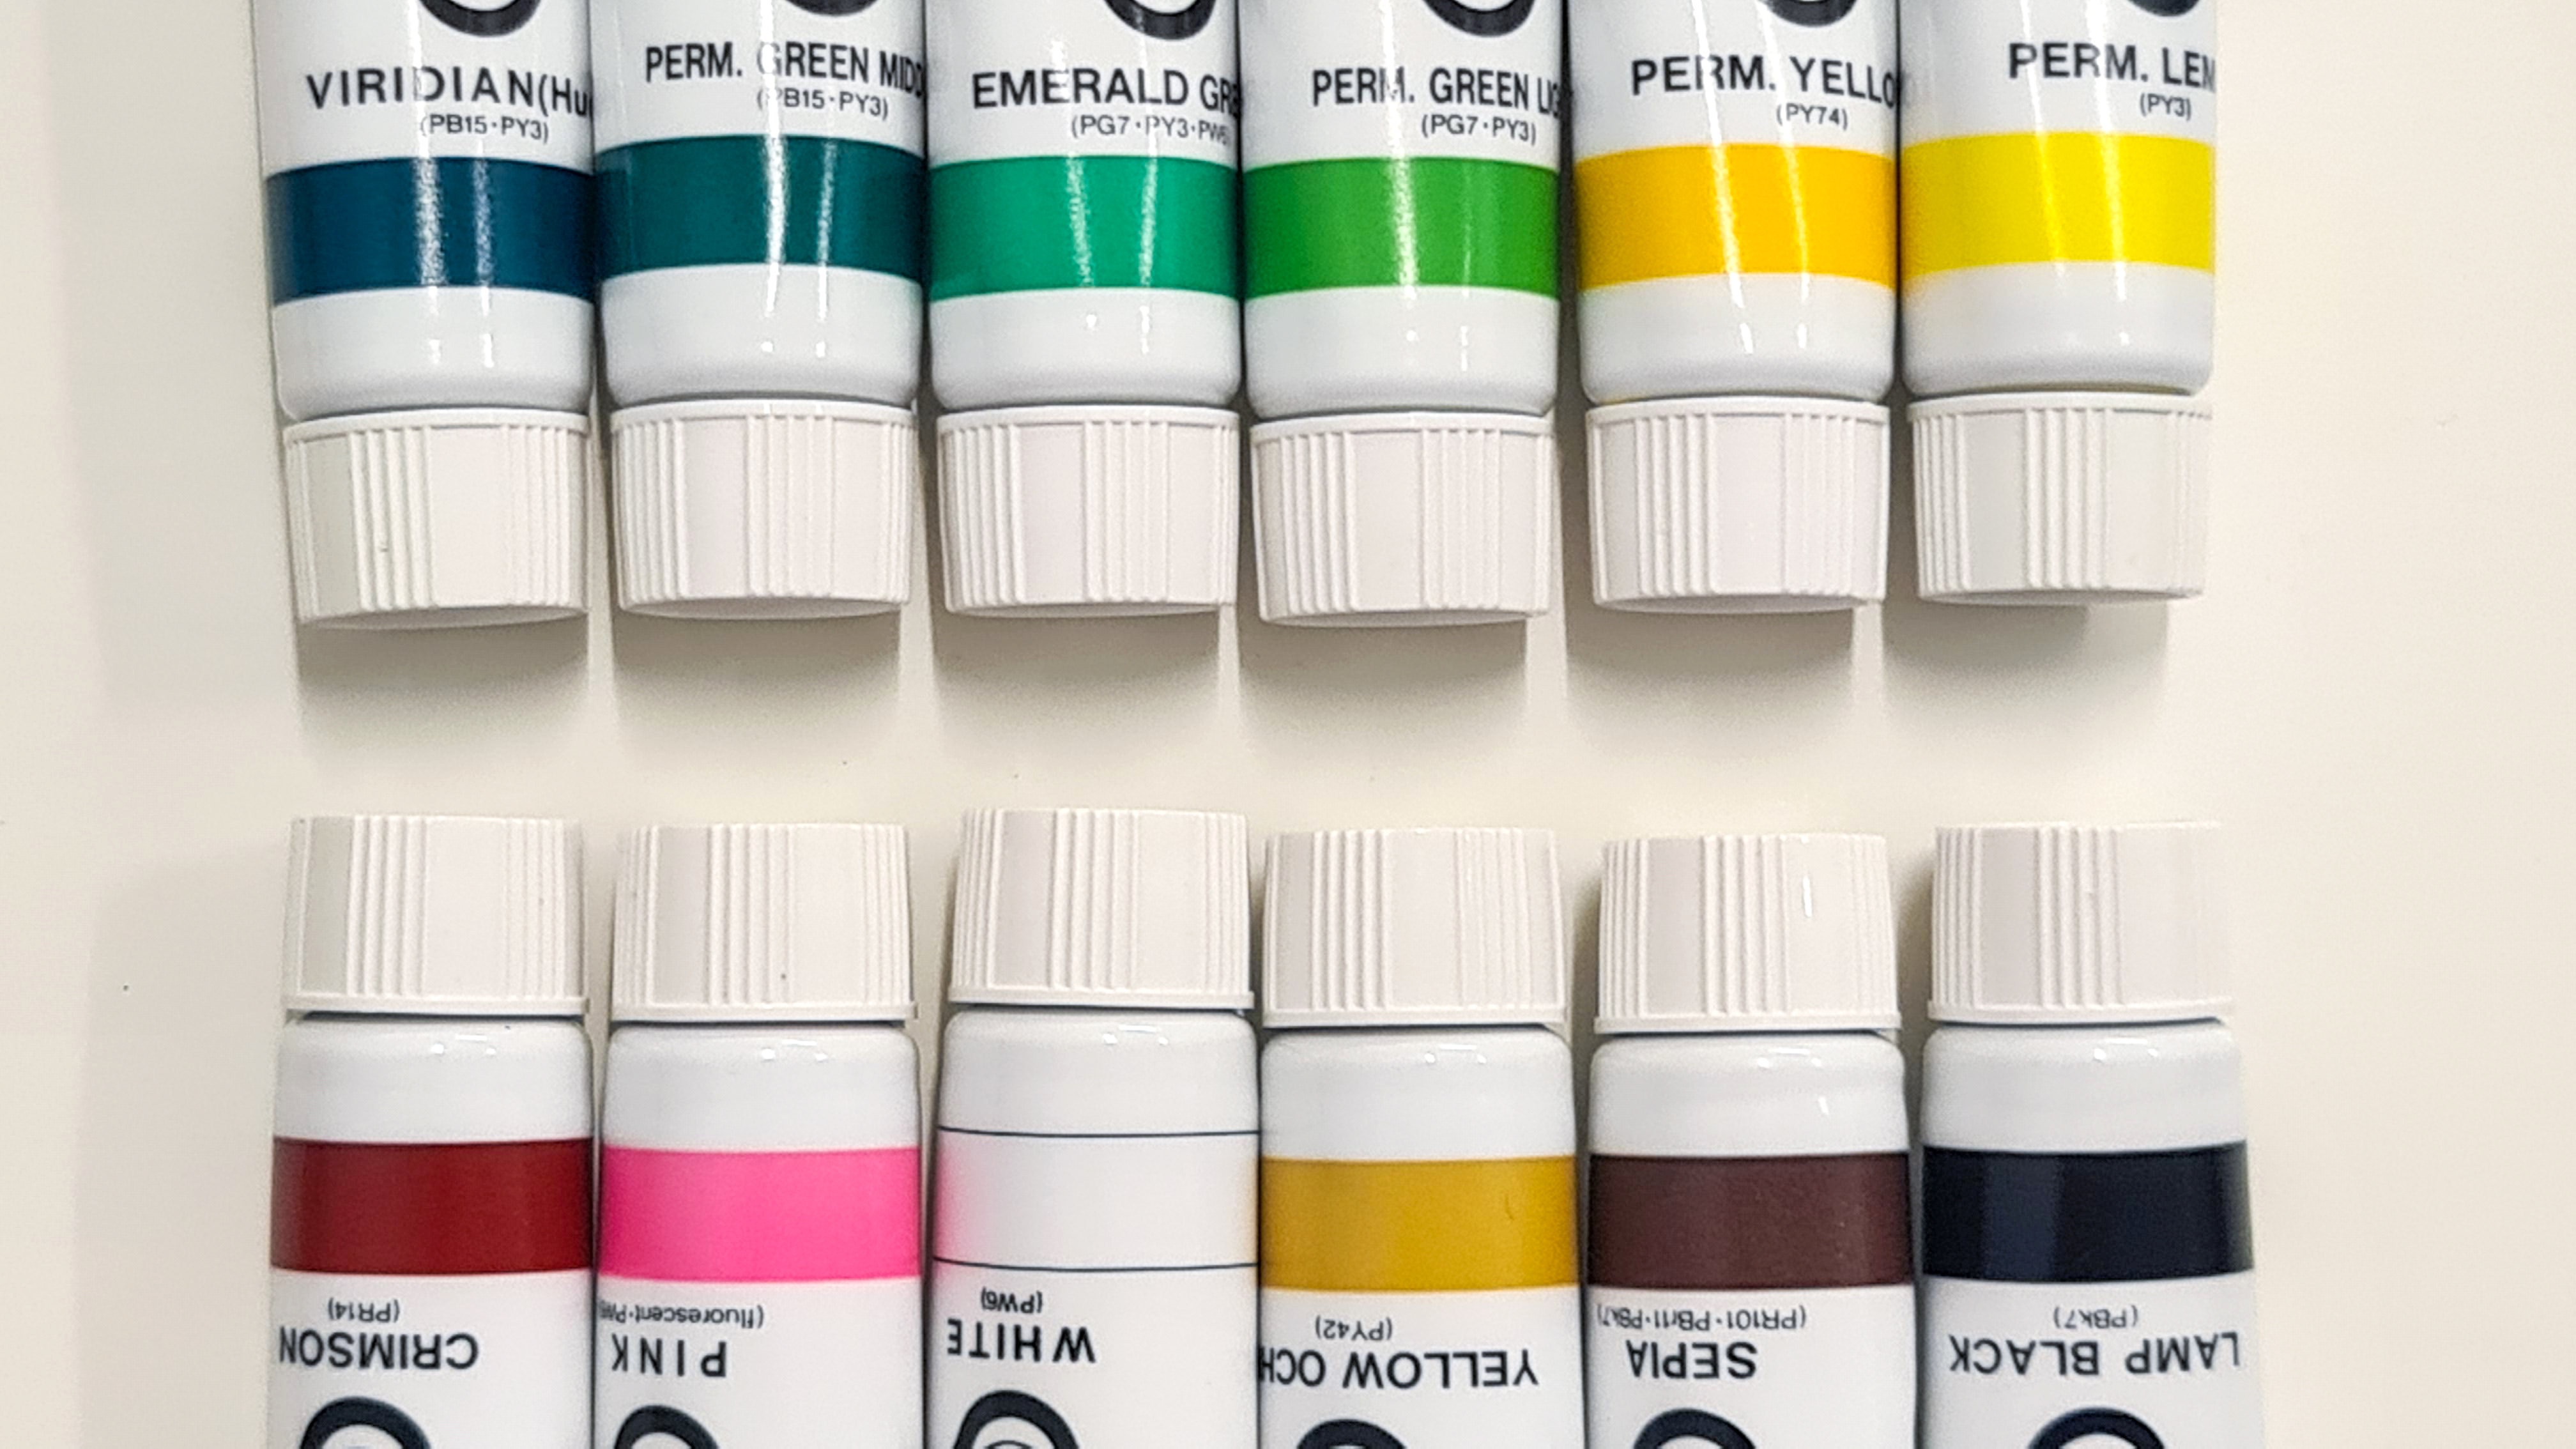
Go through the acrylic gouache paints you have at hand, and pick out a few colors to use in this illustration. 3-4 shades of green, a yellow, some pinks, brown, a black and white would be my recommendations, but you’re welcome to pick a set of colors that speak to you.
Depending on your specific paints, you may need to mix multiple paint colors to arrive at a given color.
Step 3: Paint the Background

Load up a big brush like the TPL size 10 round brush and paint the background areas of your sketch.
Don’t worry about trying to paint around all the minute details of the plant. To keep things easy, you can paint over parts of the plant sketch as well, as these can be painted over easily in the later steps.
Step 4: Paint the Base Colors

Using small to medium sized brushes, lay down the base colors of the different elements that make up the planter- including the decorative beads, ropes, the plastic inner pot and the planter itself.
Remember to allow each area to dry completely before painting adjacent areas or subsequent layers.

Grab Peggy Dean's Guide to Nature Drawing & Watercolor for extra inspiration!
Step 5: Paint the Shadows
Capturing some of the shadows in our image really adds interest to the illustration by making it look more dimensional and introducing more visual contrast.
Observe the reference image to identify where the light source might be and consequently, where the shadows fall. Use a slightly darker and slightly duller version of your base color to paint the shadow areas.
Remember to paint the shadows falling on each base color separately using the corresponding shadow colors.
Step 6: Paint the Midtones
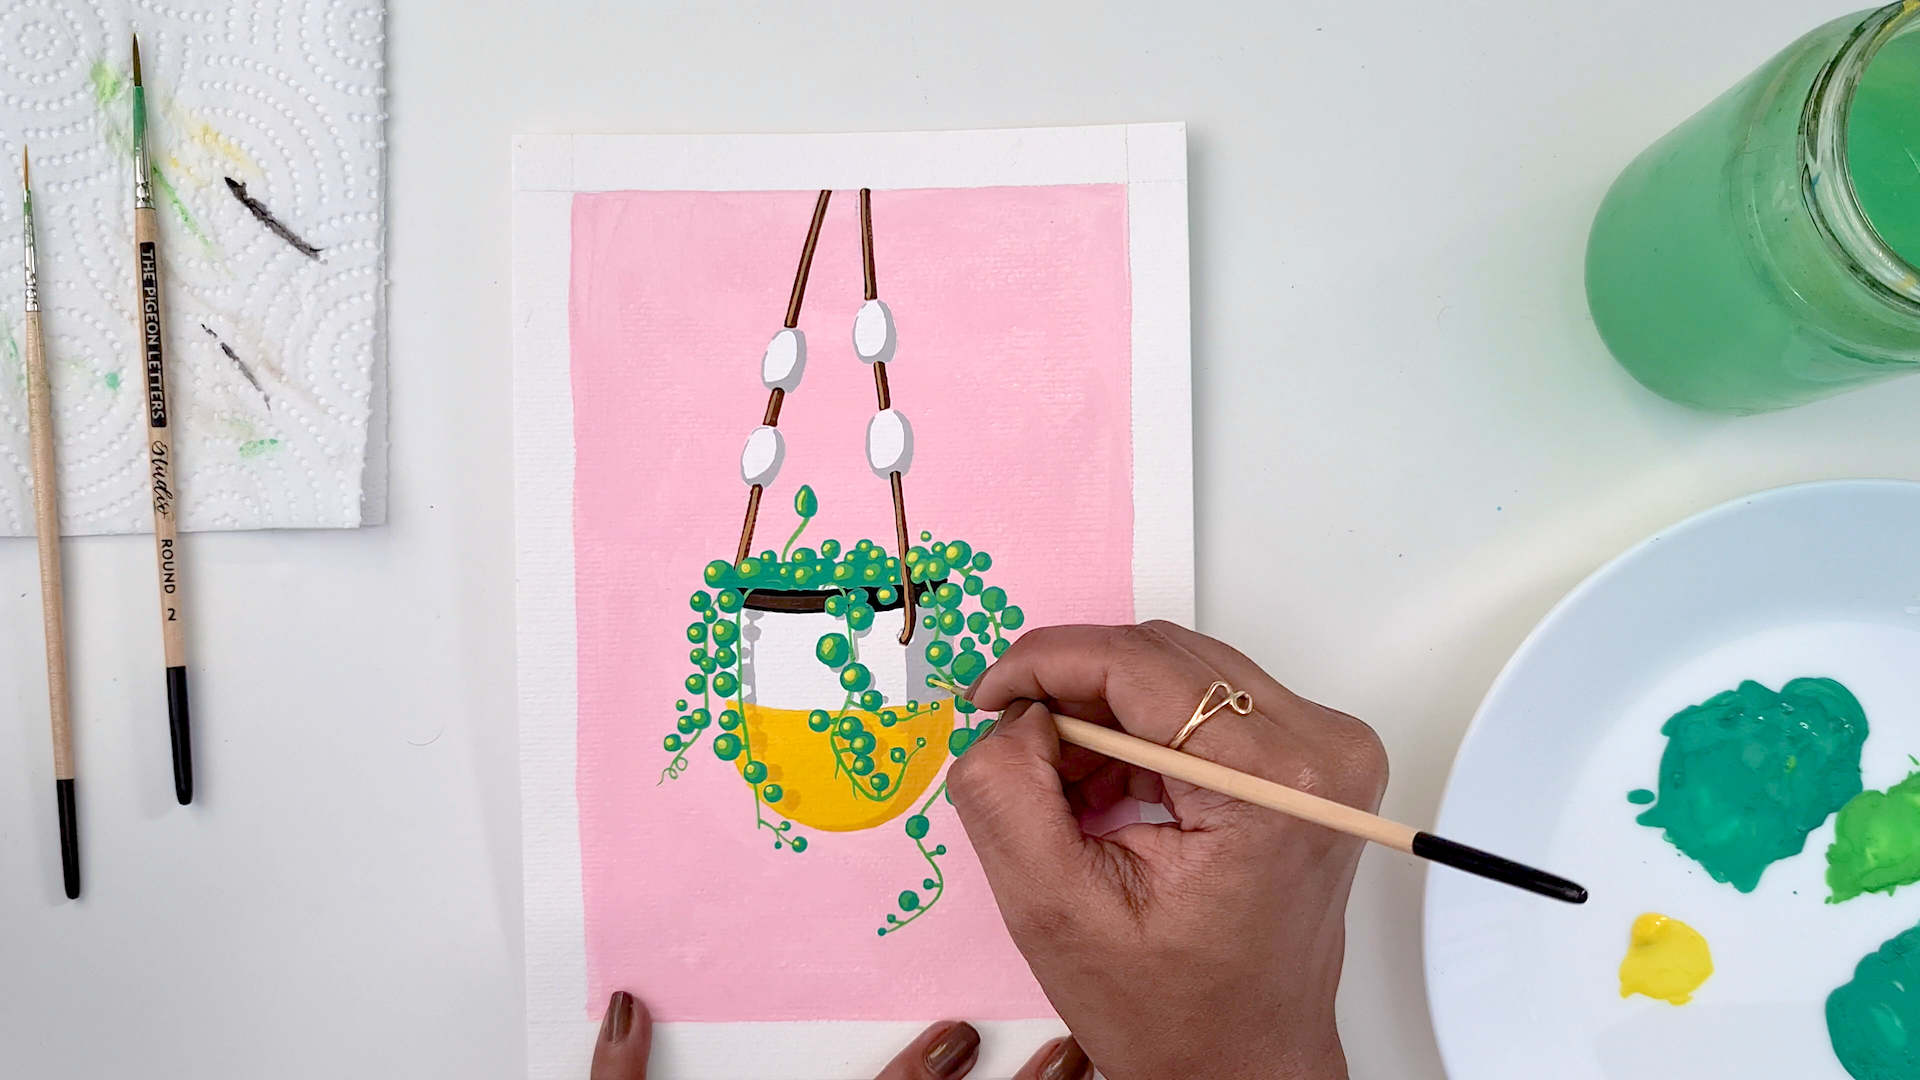
Now, all we have left to paint- is the plant itself. We follow the same method as before- starting with laying down the base color or the midtones.

Using a light shade of green and a small liner brush like the TPL size 20/0 liner, paint all of the hanging vines.

Use a medium shade of green to paint each of the pods on the string of pearls plant, using small circular strokes.
Step 7: Add Highlights

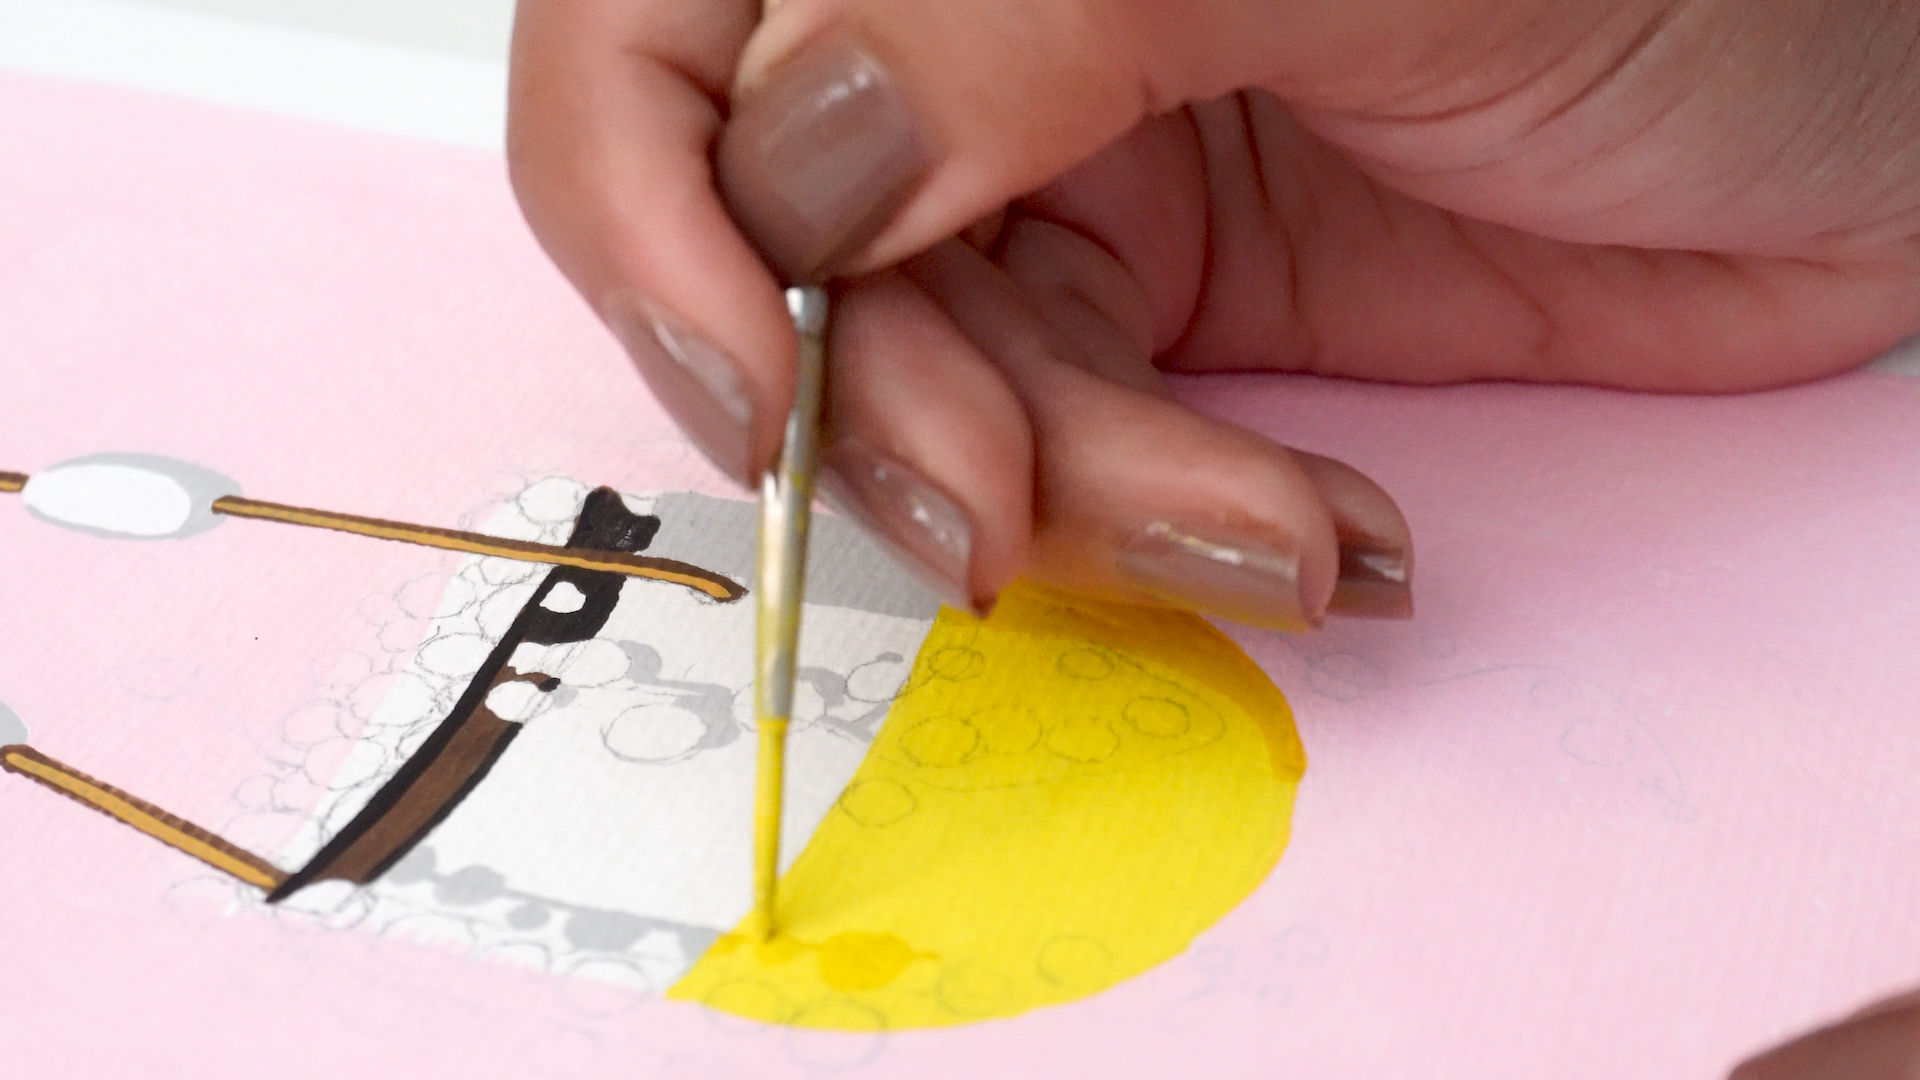
Next, paint small blobs on the top left side (the parts facing the light source) of each of the pearls to add some highlights to them.
Once this layer is fully dry, use yellow paint to add even smaller dots over these highlights to indicate a brighter set of highlights.
Step 8: Add Shadows to the Plant

As a final step, identify the darkest areas around the body of the plant and paint these areas with a deep shade of green to indicate the darkest shadow areas. This step adds a good level of visual contrast and helps define the shapes that make up the plant.
And ta da! Your absolutely stunning hanging strings of pearl plant illustration is done!

I cannot wait to see what you created as you followed along with me on this tutorial. So please do share your own versions with me. If you post them on social media, definitely tag Peggy @thepigeonletters and me @vinithamammen.
If you’re interested in learning more from me, be sure to check out my Skillshare classes and follow me on Instagram @vinithamammen.
Until next time, bubye and happy creating!

See all of Vinitha’s tutorials on the blog!
Vinitha is a mechanical engineer turned fashion designer who's now a full-time freelance lettering artist, illustrator and Skillshare Top Teacher. She is most passionate about creating work around feminism, women empowerment, body-positivity and self love. She loves playing with bold colors and minimal styles and her best work comes from creating for the sake of creating.


