Happy, HAPPY Pride, everyone! This tutorial is from last weekend when Peggy Dean hosted 2020 Creative Virtual Pride and I'm so honored to be presenting you with none other than a cacti watercolor tutorial. As if these cacti couldn't get any more adorable, I've incorporated pride colors in the painting itself. I can't get enough of these prickly plants so it's no surprise that I'm sharing my step-by-step process today. - Jamie Kim, artist - see bio at the bottom of this post :)
You should also know that this tutorial is super easy and accessible to any level of an artist, so don't be shy. Whether you're a beginner or have been at it for years, this tutorial will be all the same fun.
Supplies:
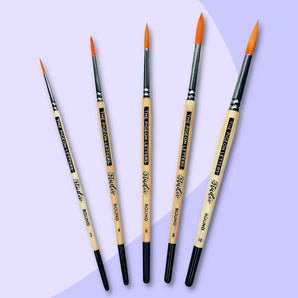
The Pigeon Letters Studio Round Brush #10 and #4
Watercolor Paints (crimson, yellow pale, orange-yellow, yellow ochre, sap, deep green, pthalo blue, violet)
White Gel Pen or White Gouache
Step 1: Paint Cacti Using General Shapes


We'll start by painting our shapes with light shades of green and we'll add more water than pigment to create the lightness we want. That way we can build on the color and can create shadows from where we started. While the paint is still wet, we'll drop in a darker green paint on the left side, which will be our dark shadow.
I have a value sketch hanging out on my left so I can better visualize where I need to place the shadows. I highly recommend this method. It has seriously saved me many times in the past! Adding different values will help give our cacti form and dimension.
Step 2: Create Pots for Your Cacti

We'll paint our pot shapes with yellow ochre (feel free to use any color close to that). We'll keep our color light so that when we add our bright rainbow, the vibrant colors will shine through. The rainbow, of course, is going to be the main attraction (obviously).
Next, add the dirt (mix yellow ochre, phthalo, crimson) and flower shapes (crimson). Wet the area before dropping in color for a fun blend.
Step 3: Paint a Rainbow!

Here's the fun part guys! Using a smaller brush, paint stripes of color for the rainbow. Start at the left end of our left pot, using the flat end of our brush, paint the curve of the rainbow going up, then pick up the paintbrush and continue painting down to finish the right pot.
I'm doing a classicly colored rainbow, but use any colors you're digging. It's also very important that we use a clean brush for EACH color of our rainbow. If our brush isn't clean, the colors may mix more than we want and we'll lose the vibrancy of the rainbow.
Pro tip: Press your brush flat onto the paper for a wider stroke.
Step 4: Paint Shadows

Add shadow by painting a strip of dark blue (mix phthalo blue with violet). Then, blend with clean water to fade out the edges. Don't press too abruptly with your dark blue paint, as we want to be able to blend out the harshness.
Step 5: Add Details

This is where you get to really make it your own! Have fun with the details. Use a dark green and white gel pen to add dots, lines, spikes! My favorite things to add are definitely heavier green shadows and white dots or lines to my cacti. Don't forget our flower detail either, add as many or little as you'd like.
Step 6: Add Splatter

Finish with splatter by taking a little bit of green and tapping your brush. Try not to get too crazy on this part, trust me, I've been there and you don't want to go there!
We're finished! I hope you had fun because I know I did. Thanks for painting along with me! Video linked below for some even better visuals of our rainbow cacti!
Find me on my website and tag me in your colorful creations on my Instagram!

Hi everyone, Jamie Kim here! I think I've made it clear that I love cacti and all plants alike. I guess you can also see that I'm a lover of watercolor and basically all art, I'm not shy about it! Other things I love are anything Murakami, embroidery, gouache, pumpkin butter (because who doesn't?), and did I mention cacti and succulents? When not holding a pen or sketchbook, I can be heard playing the guitar, uke, and piano!


