Let’s travel out west together as we create a nighttime desert scene! In this tutorial we’ll use the Botanical Line Drawing book to draw a variety of cacti and succulents. Then we’ll combine watercolor and ink to add color and detail, so follow along for more!
In the middle of winter, all I can think about is traveling somewhere warm. Since I can’t physically travel anywhere right now, at least I can travel to the desert via my art!

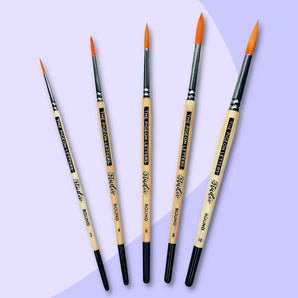
Supplies:
- TPL round brushes in a variety of sizes
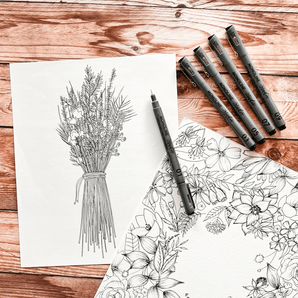
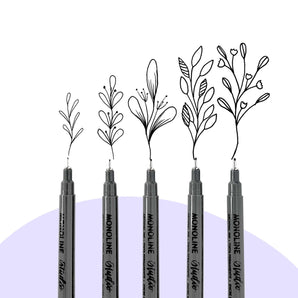
- TPL monoline studio pens
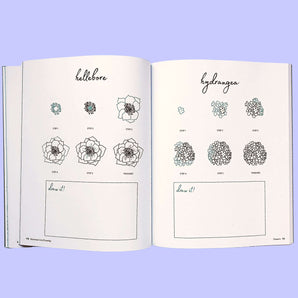
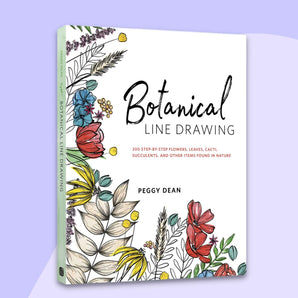
- Botanical Line Drawing: Cactus and Succulent Edition by Peggy Dean
- Watercolor paper
- Watercolor paint
- Pencil
- Masking fluid + old paintbrush
- Water cup + paper towel or rag
- Metallic watercolor (optional)
- Airstream reference photo

Prefer watching the tutorial?
Step 1: Sketch the Botanical Elements
In the book Botanical Line Drawing: Cactus + Succulent Edition by Peggy Dean, let’s find a handful of plants to incorporate into our scene. Choose whichever botanicals you personally vibe with, but I’ve chosen saguaro (page 73), tuna cardona (page 77), desert spoon (page 113), Joshua tree (page 97), and ball cactus (page 75).

Start with the Joshua tree and Saguaro, and then add the smaller plants in slightly lower on the page; this will give the impression that they’re closer to the foreground.
Step 2: Sketch the Remainder of the Scene
Next, sketch in an Airstream trailer: I’ve provided a link to royalty-free reference images, so feel free to use one or combine a few of them to invent your own! Make sure the Airstream is drawn close to the center of the page: we want it to appear that the trailer is behind all of the botanicals

A nighttime desert camp isn’t complete without a little mood lighting! Draw a loose line connecting the saguaro to the Joshua tree, and then add evenly-spaced circles along the line.
Finally, lightly sketch in two mountain ranges and a crescent moon. In the lower left corner of the paper, you can add in some squiggly shapes that will become desert rocks.
Step 3: Add Masking Fluid
If you’ve never used masking fluid before, you’re in for a real treat! Masking fluid is a liquid that turns rubbery when it dries, allowing you to paint right over it and then easily remove it, leaving white paper behind like magic.
 ia
ia
In this piece you’ll use masking fluid to cover the moon, string light bulbs, and the nubs atop the tuna cardona cactus. If you’d like, feel free to add masking fluid over all of the desert plants as well - this will make it super easy to paint the backgrounds in without messing up the plants!

*Important note* Use an old paintbrush for this step! Masking fluid solidifies quickly and will ruin a good paintbrush after just one use. I have a very old small paintbrush I use specifically for masking fluid application. Be sure to rinse the brush immediately after using masking fluid to prevent the fluid from drying inside the bristles.
Step 4: Paint Background and Airstream
Time to grab your watercolor and start painting! Begin with the large areas of the scene; since we’ve added masking fluid over the smaller elements, you’re free to wash watercolor over the large areas without too much worry. I’ve used a deep gray indigo for the sky, lilac for the mountains in the distance, amethyst for the closer mountains, and a light ochre for the sandy ground. Using a silvery gray shade, paint the Airstream trailer.


A tip for making the background washes look more interesting: add drops of darker shades or water onto the page while it’s still wet. Let it blend and create its own random patterns!


There's never enough botanical inspiration, so grab this book to continue practicing.
Step 5: Remove Masking Fluid and Paint the Botanicals
Once the background is dry, you’re free to remove the masking fluid. Use your finger to lightly rub the dried fluid; it should start to peel up with just a bit of friction. Discard the scraps.

Now it’s time to begin painting the botanicals! Use a variety of green shades or get creative and make a totally unrealistically colored desert scene - it’s up to you! Allow the greens to blend and mix together, or add drops of water to create blooms in different spots. For the desert spoon, I painted the spikes using different shades or green, letting each color dry before adding the next.


Step 6: Paint Final Watercolor Details
Add another layer of ochre to the pile of rocks so they stand out a bit more from the background. Use a light blue to fill in the windows of the Airstream. And finally, if you have metallic watercolor paint, use that for both the moon and the lights to add a little sparkle! Otherwise you can use a light yellow for both of those.
Once this is all dry, use amethyst or another dark shade to add shadows beneath the botanicals, rocks, and Airstream. Since I placed the moon in the upper left, the shadows will stretch toward the lower right. I don’t make them too detailed; just a little wiggle of the paintbrush gets the point across!

Step 7: Add Ink Layer
After the entire painting is dry, it’s time to go in and add the final details using monoline pens! I used the 03 and 05 to draw the larger elements, like the mountains, Airstream, and main botanical outlines. I used the 01 size for the smallest details, like the spikes on cacti and the squiggles and lines to indicate texture and shape.

And that’s it! You can now escape the cold for a warm desert camping trip, at least on paper. Share your desert botanical scene on Instagram and tag me (@thealiciabruce) and The Pigeon Letters (@thepigeonletters) so we can see your amazing work!
![]()
See all of Alicia’s tutorials on the blog!
Alicia is a 30-something photographer and artist with a love of color and a refusal to act her age. She favors a mix of pastel and bright colors, reminiscent of southern California and the 1960s, and is inspired by her travels around the world, wildflowers that might have been found in a hippie's flower crown, and lettering that has a little bit of flair to keep it whimsical.